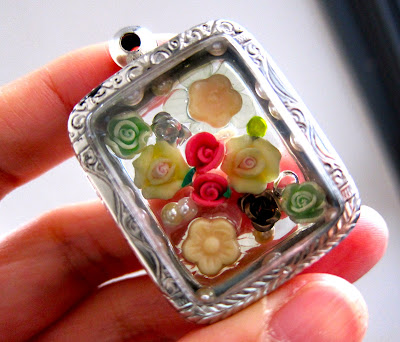
Just thought of finishing this tutorial for you while my son's in school. Missing him a lot! So quiet in the house.
Here it is..
I just love to "hoard" lots of materials that I can use with clay.
Here it is..
I just love to "hoard" lots of materials that I can use with clay.
I know lots of you can relate with me! haha
Polymer Clay push molds are one of the materials that I can't stop collecting or buying. Here's the proof:
These push molds are very easy to use and the designs are so many...from flowers, to animals, to borders etc etc! Just spray a bit of water or powder it a bit then push the the clay inside..push it out and voila! you already have a rose, dog, cat..etc!!!:)
So I thought of putting these push molds to use and came up with this tutorial for you!:) I made
a CUFF like this before using white clay. For today, I will teach you how to make this...
Prepare the ff:
 |
| Prepare your push molds. I used my sculpey (the beige colored ones) and makin's (the transparent ones) push molds . |
You will also be needing the ff:
Metal cuff base (about 1.5 inches wide)
Water
Antiquing Medium (i use studio by sculpey)
Tissue or Baby wipes
Tissue Blade
Liquid Clay
Alcohol Inks (optional)
Metal Leaf (optional)
 |
| Cover the top part of your metal base with clay. Trim the excess. |
 |
| Apply Liquid clay to the surface of your clay base. (I used Fimo Decogel) This will help adhere your clay flowers and leaves to the base. |
 |
| Choose the flower designs that you like to use. Spray a bit of water before pushing your clay in the flower mold. (this will act as the release agent) |
 |
| Arrange your flowers and leaves the way you want them. There's no right or wrong here..just make the arrangement that you have in mind:) Our goal is to fill up all the spaces that we can see! |
 |
| Just trim the excess parts of the leaves or flowers. Follow the edge of your base. |
 |
| For the small spaces, you can fill it up by making small clay balls using your beige colored clay. Then using a tool with a rounded tip, you poke the middle of the ball. This will add more texture. |
 |
| You can also make swirls just like this one and use it to fill up small spaces. |
 |
| These three pictures show my progress in filling up the surface with the flowers, leaves, balls and swirls. |
 |
| Make sure that the details of your leaves and flowers are clear. It is important that the grooves, curves and lines are visible (these details will pop out when you apply your antiquing medium) |
 |
| I just thought of adding more color by using my alcohol inks. The effect is really nice! |
 |
| Then also thought of adding bits of gold leaf! love the effect also! :) |
Then it's time to bake your piece. 275F for 30-40 mins.
 |
Using your baby wipes or tissue, wipe the excess paint off. Using a dry tissue, will make the effect darker. Using a baby wipe (because its wet), will make the real colors of your clay pop out more. |
 |
| Finished with antiquing. Let it dry. You can make the drying faster by popping it back in the oven for about 5-10 mins. |
 |
| Trim the excess. |
 |
| Cut a strip of the clay that you used for the inside of the cuff. |
 |
| Then lay the strip on the side of your cuff. This will serve as the cuff's border. Bake your piece again. Finished!!  |
Very easy right? Now you can use your push molds to the maximum! haha
I'm thinking of using my steampunk push molds next time!
Hope you enjoy this simple tutorial! If you happen to make a project using my tute..pls share what you made with me! I would be very happy to post it here in my blog.
Have a good day everyone!:)


